It’s my party!

If you have never heard of Milk Bar Bakery you need to start your Googling now! I discovered it from watching Netflix – Chef’s Table: Pastry, Episode 1: ‘Christina Tosi’.  Christina is my spirit animal! Feisty, sweet and full of fun! She truly is inspirational.

I decided for my birthday this year to recreate her bakery favorite – Birthday Cake – as a treat to myself. HUGE DISCLAIMER – I have never liked funfetti cake. There is something about it that just isn’t my style, but who could resist the bright colors of sprinkles – and it has a MILK CAKE SOAK and CAKE CRUMBS! So Happy Birthday to me!! I decided to go all in and recreate her colorful, sweet and fabulously fun cake.

IMG_6078

Christina uses clear vanilla extract in her recipe, which she states gives the cake and frosting that boxed mix and canned frosting flavor, but homemade. I do agree with her that it gives that “extra” over-the-top vanilla flavor that is reminiscent of a box mix, however, this is WAY BETTER than a box mix and canned frosting. SO MUCH BETTER!

I looked over the ingredient list and had most items at home, but I did not follow the recipe to the letter. The recipe is a little long in how they have it written, as it includes assembly instructions, but it’s well worth the read to get to the “cake” of the recipe.

IMG_6080

I eventually decided to make this batter into cupcakes so that I could share at work! They got rave reviews! I made a double batch of cake, which made 25 cupcakes, and a double batch of frosting, and I had six cupcakes that didn’t get frosted. I would definitely triple the frosting for cupcakes – as this cake is a “naked” frosted cake, so there isn’t a lot for piping – which is my favorite way to frost cupcakes.

IMG_6081

Making cupcakes is less time intensive as they cool quicker and you don’t need some of the extras – acetate and a cake ring. Since I didn’t have all the ingredients, I made do with what I had, and it didn’t disappoint, so don’t let laking a few ingredients or hardware items stop you from trying something NEW. I didn’t have citric acid, grape seed oil and glucose, so I used light corn syrup instead of glucose and vegetable oil instead of grape seed. I omitted the citric acid.

IMG_6076

I LOVE the crunch that the cake crumbles add to this cupcake, and the cute and simple decoration they provide! This cake and frosting really ticks all the boxes for me! It’s a soft and moist cake, with the sprinkles giving it a slight crunch of texture. The frosting is smooth and slightly tangy, and we’ve already given much love to the cake crumbles.

I highly suggest making this recipe just because – it won’t disappoint! Don’t let the recipe name “Birthday Cake” keep you locked in for baking it just for a party. Make this cake just because you want to smile or put a smile on someone else’s face!

IMG_6079

Cinnamon Ornaments

I love decorating my Christmas tree! It is a fun and sometimes bittersweet trip down memory lane as I pull out keepsake ornaments (one from my grammy, my dad and aunt, all whom have passed away; and ones from my girls that are homemade or in the year of their births). IMG-2517

One of my favorite homemade gift are these Cinnamon Ornaments! They are so easy to make and smell amazing. I made some three years ago, and they still smell great on my tree. This is a great activity for kids to help with and gives them the pride of knowing they did most of the work.

IMG-2509

Ingredients:

1 cup ground cinnamon
4 tbsp. white school glue
3/4-1 c. water

Directions:

Preheat your oven to 200 degrees F. Line three baking sheets with parchment or wax paper. In a large bowl add the cinnamon and glue. Add 3/4 c. water to start with. Mix well until there is no more dry cinnamon. If you need to use the remainder 1/4 c. of water, mix in a little at a time. The mixture will feel spongy … remember FLOAM? That is the consistency your are looking for. Roll mixture out onto a piece of parchment or wax paper and use your favorite cookie cutters to create fun shapes. After placing these on your baking sheets, use a skewer or tooth pick to make a good size hole near the top, being careful not to be too harsh or it can break apart the shape. Bake in the oven for 2 hours. These will start to curl slightly while baking, so I always flip them 1/2 way through. This also gives you a chance to inspect the holes – you may need to use your skewer/toothpick again to help the holes stay open. You want to make sure you bake these for the full two hours so that they don’t break once hung on the tree. Once baked, let them cool before adding ornament hooks, ribbon or string. I have in years past added raisins to the gingerbread cutout for eyes and buttons, and we have used metallic Sharpies to decorate them as well. I even brought some into work to put on my mini tree near my desk. The possibilities are endless! I can’t tell you enough how great these smell – my house currently smells like a giant cinnamon bun, and they will bring a smile to anyone who receives them as a gift.

IMG-2521

Merry Christmas!

Farewell

My oldest daughter LOVES to read. I actually call her Rory (Gilmore Girls reference) sometimes. We have had the same conversation Lorelei and Rory had regarding things not fitting into a backpack because of multiple books. To say my daughter reads a lot is an understatement. She would love nothing more than to spend a day curled up and reading a book! She is in eighth grade this year. She has had two librarians in her life thus far and she has taken a shine to both.

IMG_2007

In the next few weeks our middle school/ town librarian will be embarking a new adventure with her family in another state. We are sad to see her go, but we wish her all the best! She has picked out numerous books for Kailee, as I am sure she does for many folks in our town and school!! Kailee loves that Audrey will search for just the right book for her, or be able to come up with a title at ease that fits just her style. Thank you Audrey for making our children feel special, and for knowing just what book to pick! The next librarian has some big shoes to fill – I hope they welcome the challenge and our kids with “open books.”

As a token of appreciation I made some chocolate cups for her. I mean, who doesn’t love to each chocolates while they read?!?

IMG_2006
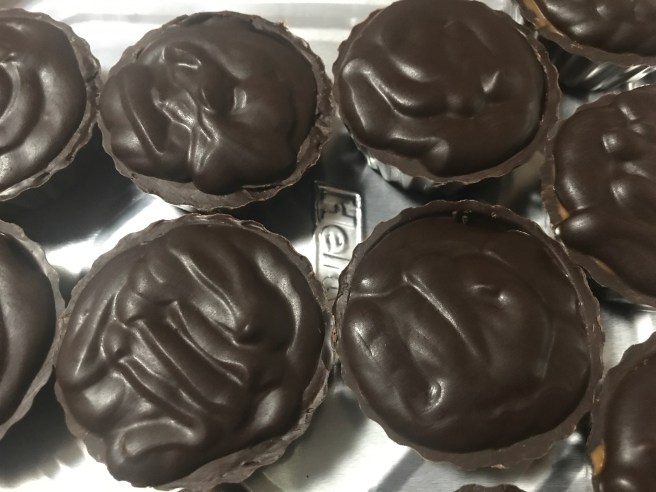
You can make the chocolate cups with a candy mold and tempered or compound chocolate, OR you can buy ready made ones at your local grocery store. I filled them with Biscoff Cookie Butter Smooth Spread and topped with dark chocolate ganache.

IMG_2005
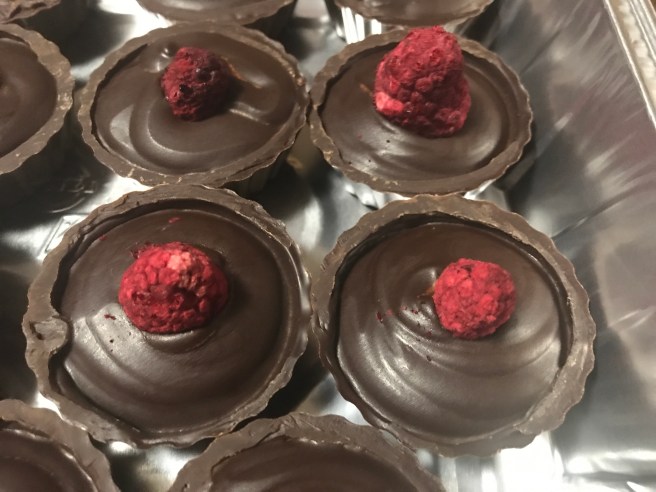
I also made ones that I filled with just the ganache and topped with a freeze dried raspberry.  I used my go-to ganache recipe.

These are super easy and quick to make because you don’t have to let the ganache sit before using it, as you might if you were piping or frosting a dessert, especially if using store bought chocolate candy shells. You fill them and are ready to enjoy!

The possibilities are endless – get creative!! These are a quick treat with big flavor!


Edible Raw Cookie Dough

Yes, you read that correctly! EDIBLE RAW COOKIE DOUGH! I think I may have died and gone to heaven – and I think this may be extremely dangerous now that I know a great recipe for this because I will most likely put it in many creations to come!

I did some research and found that not only eggs make raw cookie dough unsafe to eat, but RAW FLOUR is also a big reason. Who would have thought? Not me! That being discovered I scoured recipes for a version that heats flour to kill any harmful bacteria. There were several recipes that called for cream cheese, which I personally feel can be over powering; and some called for no brown sugar, which I LOVE. I actually make brown sugar chocolate chip cookies – which have the most decedent caramel flavor! (They are actually my most requested treat from family and friends). So yeah, I looked past all those recipes and settled on one that seem perfect and boy was it ever!

sprinklesomefun.com was the WINNER! You can find the original recipe here. I doubled the recipe so that I could use it to make a good size “cookie” on the top of my chocolate cupcakes. I would also note that this is a thicker recipe – more true to a dough – so if you are looking to pipe or frost with this recipe you will need to either adjust the amount of dry ingredients or play with amount of milk you use. I would use the original for filling cupcakes or putting between layers of cake (using no tip on your piping bag and filling or swirling) and the obvious choice – EATING IT OUT OF THE BOWL!

I decided to make this recipe because my sweet brother asked me to make cupcakes for his soon-to-be stepdaughter’s ninth birthday. He and his fiancee gave me the okay to make whatever I felt would be fun and festive. So … I went with raw cookie dough and rainbow buttercream – and they were hits all the way around.

16730384_621715818035450_7764485945585099471_n

Edible Raw Cookie Dough Ingredients: (this is a doubled recipe)

2 cup AP flour (making sure that the temp gets to at least 160)
2 stick softened/room temp. butter
1/2 tsp salt
4 tbsp. milk
1 cup powdered sugar
1 cup brown sugar
1cup mini semi sweet chocolate chips
2 tsp vanilla extract

Directions:

Place flour into microwave-safe bowl and heat until temperature reaches at least 160. This will kill any harmful bacteria. In a mixing bowl add softened butter and both sugars to the bowl and cream together. Add salt and milk into a small bowl and stir. This will help incorporate the salt evenly throughout the batter. Slowly add flour and milk/salt mixture. Mix until combined – making sure to scrape down your bowl with a spatula a few times. Add in mini chocolate chips.

Keep refrigerated until ready to eat! Enjoy!


Sh*t Happens

Let’s face it. Sometimes we just need a good laugh. It can be cathartic and good for the soul.

I was scrolling through Facebook late at night a few days ago and saw a video from Hungry Happening’s for Poop Emoji Fudge. I knew I had to make them.

Not only because they are so stinkin’ cute, but because the way life has handed me one shit show after another recently – I needed to laugh or cry. I decided to laugh, and laugh I did!

I doubled the recipe and brought these cute little turds to work to share the laughter. We all need to lighten up once in awhile and be silly, carefree and childish. I can think of no better way to do this then POOP EMOJI FUDGE!!

Ingredients:
1 jar of dulce du leche (I found mine at Shaw’s near the jams and jellies)
1 1/2 bags of semi sweet chocolate chips
White Candy Melts
Candy sugar eyes

img_2722Directions:
In a medium sauce pan over low heat melt the dulce de leche and chocolate chips until smooth. While keeping an eye on saucepan, cut the Candy Melts in half to use for the mouths. Carefully spoon mixture into a piping bag that is fitted with a large round tip. Pipe in a swirling motion onto parchment paper. Add eyes and 1/2 a white Candy Melt to make face. I found it best to do these in batches. Once I had used what was in my piping bag, I added the eyes and mouth. Then went back for more of them mixture and repeated. This way, the eyes and mouth would stay on as the fudge sets quite quickly once it is piped out.

Espresso Buttercream!

13428572_498315767042123_1692144594965911317_nThis recipe frosts 24 regular cupcakes OR 12 extra large cupcakes with a 1:1 ratio of frosting to cupcake! You can half this recipe and probably be just fine.

INGREDIENTS:
2 c. unsalted room temp (slightly soft to the touch) butter
6 c. powered sugar, sifted
3 tsp. good quality vanilla extract
3 tsp. good quality espresso powder (or less if this amount scares you; it does pack a wallop!)

DIRECTIONS:
Place all ingredients into large mixing bowl. Mix together on low while scrapping edges with a spatula. Believe me – unless you want yourself and your entire kitchen to be covered in powdered sugar – start on low! You can alter this recipe by dissolving the espresso powder into the vanilla, which will make the buttercream a tan color, but I quite like the look of the flecks of espresso. This is a softer buttercream so it spreads easily with an offset spatula but still holds its shape when piping.

You will want to lick the bowl, the beaters, the spoon and suck what is left out of the 14731392_557930124414020_7930662054414118044_npiping tip, however, I don’t suggest doing this at 9:30 p.m. (lesson learned!) or you may be up awhile. I don’t drink coffee, but if it tasted as good as this buttercream, I may just start!

This is a perfect pair with a chocolate cake/cupcake or on top of a pan or two of fudge brownies! Accent your dessert with a chocolate drizzle or a chocolate covered espresso bean!

Enjoy!

Biscoff Fudge + Mini Chocolate Chips = Cookie Dough Fudge

Sometimes I get ideas and unintentionally they morph into to something fantabulous. Last night was one of these times. I had a few jars of Biscoff Cookie Spread in my cupboard itching to turn into something tasty. I was sitting a work dreaming of what I could whip up when I got home and it hit me — FUDGE! Why have I not tried making Biscoff fudge before??!! So it started. I love eating a spoonful of Biscoff with a few chocolate chips studded through it so I figured, why not throw in my half bag of mini chocolate chips into the fudge and behold – I made a fudge that tastes EXACTLY like raw cookie dough. EUREKA! This stuff is addicting.

This recipe can easily be doubled or tripled to suit your sweet tooth needs. This would also be a great substitute for a holiday plate instead of peanut butter fudge (even if you chose not to add the chocolate chips!).

INGREDIENTS:
12 oz. white chocolate chips
1 can sweetened condensed milk
2 tbsp. unsalted butter
3/4 jar Biscoff Cookie Spread
1 cup powder sugar, sifted (this matters!)
3-5 oz. mini chocolate chips (optional)

img_1789DIRECTIONS:
Line a 11 x 7 pan with parchment (this will save you a lot of work). In a large and heavy saucepan combined white the first four ingredients. Melt over medium heat. Make sure to stir constantly and get the bottom of the pan while stirring. It only takes a few minutes for this to burn due to the high sugar content. Once the mixture is melted and smooth, remove from heat and stir in sifted powdered sugar (if you don’t sift it you risk having lumps of pure powdered sugar studding your fudge – no good). After this is fully combined work quickly if you are adding the chocolate chips, which will melt and swirl through the fudge. Pour into prepared pan and cool at room temp until set. Cut and ENJOY!

You can choose to pour the chocolate chips over the top after it has been poured into the pan, or you can used chunky Biscoff spread, or crumbled Biscoff cookies, Heath Toffee Bits … the add-in possibilities are ENDLESS!

Summer is approaching!

It has finally stopped being winter, but I best not say it too loud or it may snow again. It has happened before – that is, it has snowed in the summer before – this is Maine after all.

I was driving to work one morning after dropping my daughter off to school and noticed a homemade stand at the end of a drive way – RHUBARB for sale! I made a note to go back the next day and purchase some from this honor system stand. I love the tartness rhubarb brings to a dish. It is great for pies, jams and my all-time favorite – a church recipe book find – Rhubarb Jiffy Delight (you know the one! Rhubarb, strawberry Jell-O and cake mix dumped into a casserole dish).

My daughters are a huge fan of the old standby Strawberry Rhubarb Pie, so I decided I would treat them, along with my mother and grandmother, to this sweet, yet tart dessert over our long holiday weekend. I didn’t have a lot of time to make this so I opted for a store bought, refrigerated pie dough and I have no shame or apologies for doing so. I thought to make this pie a little more fancy I would do a lattice top instead, that way you can see the gorgeous filling! I also opted to use a non-tapioca recipe. I have used tapioca for many recipes – including my sour cherry bars, but the texture for me is always an issue. The recipe I used didn’t include tapioca, but did use light brown sugar as a sweetener which gave it a nice warm flavor, along with the cinnamon! It is definitely a keeper recipe!

Filling:
3 1/2 c. rough cut rhubarb (around 1/2 in thick)
3 1/2 c. hulled and halved strawberries (if you use frozen strawberries your pie will be juicier)
1/2 c. packed light brown sugar
1/4 c. cornstarch
1 tsp. cinnamon1/2 cup (packed) golden brown sugar
1/4 tsp. salt

13307268_492807374259629_9106570730030854361_nDirections:
Using a 9 in. deep pie plate,  put in bottom crust leaving around a 1/2 in. over hang. Mix all ingredients into a bowl and toss lightly to combine. Spoon filling into the pie plate. Roll out top crust larger than your pie plate to ensure you have enough strips for the lattice ( 12-14 needed). I rolled mine out on parchment and used a pizza cutter to cut my strips. I gently starting latticing being careful not to get the filling all over the top part of the strips. Once latticed, I gently tucked and rolled the edges of the top and bottom crust together, ever so gently pinching them to keep the rolled edge look. I brushed the top with an egg wash (1 egg and a tbsp. of water) to help it turn golden brown. I set this on a parchment lined baking sheet and cooked at 400 degrees F for 25 minutes and then reduced the heat to 350 degrees F and continued to cook for another 1 hour and 30 minutes or until it is golden brown and bubbling. You will want to let this sit until room temp. before cutting into and as with most pies – a scoop of vanilla ice cream tastes great with it! Enjoy!

PB&J Bites

I give credit to the other half of my baking brain (Mariza) for this post. She dug into the freezer in our break room and pulled out these bite-size balls of goodness. I was hooked. It was like eating a PB&J cookie dough. Now, I have to state that I am one a very few that do not like peanut butter and chocolate together – I know, I know – I am crazy for thinking this apparently. I like my peanut butter with jelly or celery. So these were perfect for me (although they do have white chocolate chips – but my school of thought is that white chocolate isn’t really chocolate at all, so I am good!)

I had to have this recipe! I G-chatted her immediately to ask for it. I love that we both know to wait for the, “but I did this to it” statement before actually looking at the recipe. We are baking soul mates. She is my go to for “what can I substitute” and “do you think this would taste good” or my favorite – “Oh my god! This is amazing and you have to try it.” True to Mariza fashion she told me her edits, and I loved that this was a one bowl and her version only had 7 ingredients ( I omitted the vanilla) – all of which I had in my kitchen at home – AND DID I MENTION THESE ARE NO BAKE!

IMG_0693
These are the dried cranberry version!

These little bites are perfect for a quick snack or on-the-go treat and will please even the fussiest eater. This is also a great recipe for the kiddos to help with! It’s easy and gooey, and fun to mix up. Sometimes life can be messy, but this is the good kind of messy! Let them mix away and lick their fingers afterward. Life’s too short not to lick the spoon – or your fingers – every once in a while!

I call this altered recipe PB&J Bites (you can find the original here: http://allrecipes.com/recipe/239969/no-bake-energy-bites/?internalSource=search%20result&referringContentType=search%20results.) I choose to spilt my batch into two bowls before adding in the dried fruit – this way I could make some with dried cranberries and some with freeze dried strawberries. ENJOY!

Ingredients:
2 cup rolled oats
1 cup white chocolate chips
1/2 cup chopped macadamia nuts
1 cup smooth peanut butter
2/3 cup honey (good quality)
3/4 cups dried fruit

IMG_0688
These are the dried cranberry version!

Directions:
Place all ingredients into a large bowl and mix well with a wooden spoon (or large spatula). Once combined scoop out bite-sized portions and roll into ball. Place on parchment or foil lined baking sheet and stick in the freezer to set (about 1 hour). Once set you can try not to eat them all by placing them into a Ziploc bag. If you are not eating these right away keep them in a sealed container or bag in the freezer and take out when needed. Even frozen these can still be bitten into so they make a great last minute go-to snack or party treat!

Salty & Sweet!

CHAOS! A hamster running on a wheel going over and over the same information. It can be something small that just gets stuck in my head and even though the rational part of me knows that between the hours of 11 p.m. and 3 a.m. nothing can be solved (usually), but I still dwell. The remedy usually comes in the form of using my hands to create a delicious treat. It soothes my soul, quiets my mind and gives me peace – even if just for a few hours.

I knew this week that I had been craving something salty and sweet – not just salted caramel, but I wanted MORE! Since I already had pretzels and kettle corn, and chocolate, heavy cream, caramels, sweetened condensed milk, butter and more – I knew I could bang out a batch of cupcakes in no time. The creative team at my work has been slammed the past few weeks. They bust their asses on a daily basis and are asked for more favors than most people I know in our work place – they deserve the enjoy my salty and sweet treats!

For these cupcakes I made a basic chocolate cupcakes from Betty Crocker, only I made them with dark chocolate cocoa powder. You can also use a box mix – THERE IS NO SHAME IN CHEATING WHEN IT COMES TO BAKING/COOKING! I filled them with a basic and quick salted caramel (consisting of melting 2 bags of Werther’s soft caramels and 1 can of sweetened condensed milk, and adding crushed sea salt to taste) and topped them with chocolate ganache (1 bag of dark chocolate chips and 1 sm. container of heavy cream – melted until smooth. I let this batch of ganache sit in the fridge to cool and whipped just before it set so it had the consistency of mousse rather than frosting). Then came the fun part – I broke up a few small pretzels to top half and opened a bag of Smartfood Kettle Corn mini bag to top the other half.

Sometimes it is the littlest and easiest detail that really makes things look like you slaved FOREVER on something that really took less than an hour. Google Images can provide you some great ideas! Put in something simple  – chocolate and caramel or brownies and cookie spread or fruit and chocolate. Skim through the images and see what catches your eye! A lot of times things only look detail or hard – don’t just a book by it’s cover. Don’t just overlook something because you think it my take too long or be too hard – you just never know what you might be missing!