
It has finally stopped being winter, but I best not say it too loud or it may snow again. It has happened before – that is, it has snowed in the summer before – this is Maine after all.
I was driving to work one morning after dropping my daughter off to school and noticed a homemade stand at the end of a drive way – RHUBARB for sale! I made a note to go back the next day and purchase some from this honor system stand. I love the tartness rhubarb brings to a dish. It is great for pies, jams and my all-time favorite – a church recipe book find – Rhubarb Jiffy Delight (you know the one! Rhubarb, strawberry Jell-O and cake mix dumped into a casserole dish).
My daughters are a huge fan of the old standby Strawberry Rhubarb Pie, so I decided I would treat them, along with my mother and grandmother, to this sweet, yet tart dessert over our long holiday weekend. I didn’t have a lot of time to make this so I opted for a store bought, refrigerated pie dough and I have no shame or apologies for doing so. I thought to make this pie a little more fancy I would do a lattice top instead, that way you can see the gorgeous filling! I also opted to use a non-tapioca recipe. I have used tapioca for many recipes – including my sour cherry bars, but the texture for me is always an issue. The recipe I used didn’t include tapioca, but did use light brown sugar as a sweetener which gave it a nice warm flavor, along with the cinnamon! It is definitely a keeper recipe!
Filling:
3 1/2 c. rough cut rhubarb (around 1/2 in thick)
3 1/2 c. hulled and halved strawberries (if you use frozen strawberries your pie will be juicier)
1/2 c. packed light brown sugar
1/4 c. cornstarch
1 tsp. cinnamon1/2 cup (packed) golden brown sugar
1/4 tsp. salt
 Directions:
Using a 9 in. deep pie plate, put in bottom crust leaving around a 1/2 in. over hang. Mix all ingredients into a bowl and toss lightly to combine. Spoon filling into the pie plate. Roll out top crust larger than your pie plate to ensure you have enough strips for the lattice ( 12-14 needed). I rolled mine out on parchment and used a pizza cutter to cut my strips. I gently starting latticing being careful not to get the filling all over the top part of the strips. Once latticed, I gently tucked and rolled the edges of the top and bottom crust together, ever so gently pinching them to keep the rolled edge look. I brushed the top with an egg wash (1 egg and a tbsp. of water) to help it turn golden brown. I set this on a parchment lined baking sheet and cooked at 400 degrees F for 25 minutes and then reduced the heat to 350 degrees F and continued to cook for another 1 hour and 30 minutes or until it is golden brown and bubbling. You will want to let this sit until room temp. before cutting into and as with most pies – a scoop of vanilla ice cream tastes great with it! Enjoy!

 After I have made all my whoopie pies, I eat one. Someone has to do quality control! It’s a downright dirty job, but I will suck it up every time and eat one! Believe me, with this filling you will too!


 I have found two types of people – people who go gaga over cookie spread and those who look at you with a blank stare because they have never heard of it (I know what you’re thinking … how can someone not know what it is!?!). Regardless of which category you fall into it, I have found a recipe to feed your addiction or to start one!
 When thinking about making popcorn for the top I immediately thought of mini marshmallows. I bought a bag and went to work. I took each one and cut the top in a cross hair pattern about a 1/4 to 1/2 way down, which made them look like molars!! Not exactly what I needed for this cake, but who knows what I might need in the future!
 I pinched the bottom where it wasn’t cut and twisted which made them puff slightly where it was cut. On some I pulled the cut ends a little more apart to give variation to each “kernel.” Grab a marshmallow, cut, pinch, pull, repeat. Once I had enough to create the illusion of a mound of popcorn, I added a layer of fresh buttercream to the top of the cake to ensure the pieces would stick to the cake. To give it some color I took some yellow gel food coloring and put some in a dish with a touch of water to make it easier to paint onto the marshmallows. I did try the liquid food coloring first, and even with water, it looked more orange than yellow. I randomly picked pieces to color, and the end result was amazing!
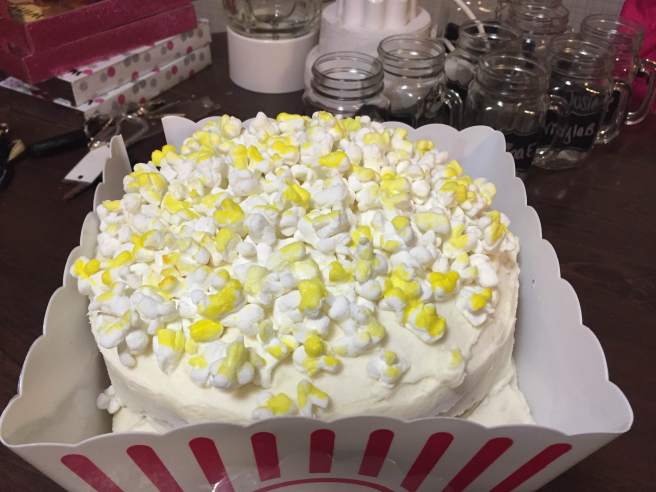
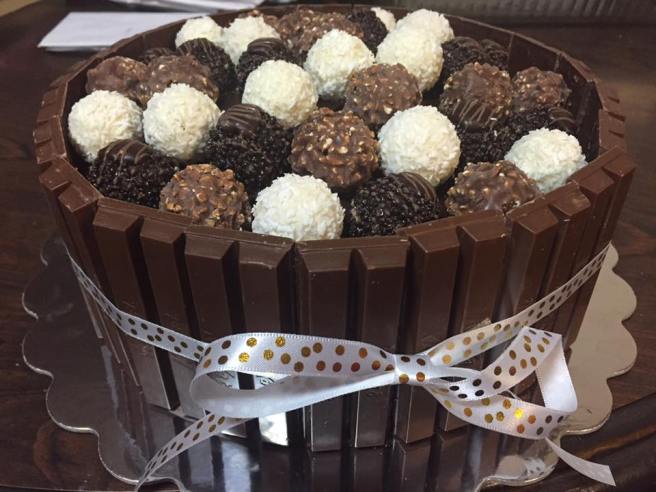
 My oldest turned 12 a few days ago. After talking about Christmas and trying to make present wish lists, we got on the topic of how much stuff we really have and how a lot of it doesn’t get used. We are those parents that have in years past gone through all the girls things and gotten rid of stuff to make room for all the birthday and Christmas presents that would make their way into our home. So, long story short, my oldest daughter decided for her birthday she wanted to have friends come over and watch a movie, play, eat popcorn, candy and cake (of course it had to look like a box of popcorn!), and just have a fun time. She also decided that she didn’t want her family and friends to give her gifts for her birthday. She wanted them to give her money, that she would then purchase gifts for The Angel Tree at our local Walmart. So she called her grandparents and told her request for her birthday and we made sure on all her invitations for her friends to let them know she didn’t want presents, but for them to help her in making her birthday wish a reality.
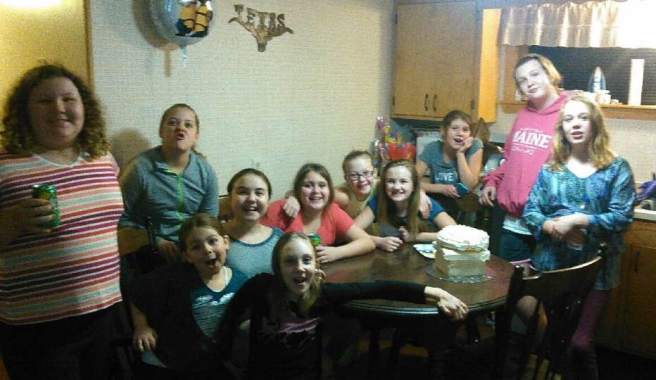 After one busy day preparing, one evening full of laughter and giggles, she came away with $280 graciously given by family and friends to spend on others for Christmas.
 The next day we put out the invite to join us shopping for The Angel Tree and thankfully one of her friends was able to go! She and her friend picked out several tags and we went on the hunt to find the items. The first tag the girls saw I think really make an impact on them – it was for a Christmas dinner for a family of four. My daughter was so saddened that a child’s wish for Christmas – instead of cool toy – was merely a family dinner. They each grabbed one. They were able to purchase cologne, many toys, a car seat, a children’s play kitchen, two gift certificates for Christmas dinners and a child’s “couch” that unfolds to become “bed.” The entire time we were in the store, not once did they look at other toys on the shelves or make comments about items that they would like or want. The mission was clear – give to others.
 At the register Kailee was proud to pay for all the items in their very full cart. I realized at check out that I had forgotten to throw a roll of tape in my purse so that we could attach the tags to each gift. I asked they clerk if she thought the service desk would lend us tape and was assured they would. As we stood in line at customer service a clerk came over and asked if we had a few items for the Angel Tree because she could help us with them. Her mouth dropped when she was told that the entire cart was for The Angel Tree and Kailee explained about her birthday request. The clerk immediately gave Kailee a big hug and thanked her and her friend, Olivia, for being so kind-hearted. We then went to pick up a few groceries and while we were in line paying for my items, the same clerk came up and asked to borrow the girls. They followed her back to the service desk where they were praised for their good deed by several employees – it truly was a group effort that made this possible!
 Sometimes it is hard to see beyond the end of our own nose. We don’t do it on purpose. Life is chaotic – for everyone. I consider any day that I can get my oldest daughter ready for school without out her forgetting something and me getting to work on time a good one! I would be thrilled if that were my biggest problem in a day, but it isn’t. I have been very fortunate (even with some of the curve balls thrown at me) to be able to keep my head above water. I have an awesome support system that I am super grateful for.


