If you have never heard of Milk Bar Bakery you need to start your Googling now! I discovered it from watching Netflix – Chef’s Table: Pastry, Episode 1: ‘Christina Tosi’. Christina is my spirit animal! Feisty, sweet and full of fun! She truly is inspirational.
I decided for my birthday this year to recreate her bakery favorite – Birthday Cake – as a treat to myself. HUGE DISCLAIMER – I have never liked funfetti cake. There is something about it that just isn’t my style, but who could resist the bright colors of sprinkles – and it has a MILK CAKE SOAK and CAKE CRUMBS! So Happy Birthday to me!! I decided to go all in and recreate her colorful, sweet and fabulously fun cake.

Christina uses clear vanilla extract in her recipe, which she states gives the cake and frosting that boxed mix and canned frosting flavor, but homemade. I do agree with her that it gives that “extra” over-the-top vanilla flavor that is reminiscent of a box mix, however, this is WAY BETTER than a box mix and canned frosting. SO MUCH BETTER!
I looked over the ingredient list and had most items at home, but I did not follow the recipe to the letter. The recipe is a little long in how they have it written, as it includes assembly instructions, but it’s well worth the read to get to the “cake” of the recipe.

I eventually decided to make this batter into cupcakes so that I could share at work! They got rave reviews! I made a double batch of cake, which made 25 cupcakes, and a double batch of frosting, and I had six cupcakes that didn’t get frosted. I would definitely triple the frosting for cupcakes – as this cake is a “naked” frosted cake, so there isn’t a lot for piping – which is my favorite way to frost cupcakes.

Making cupcakes is less time intensive as they cool quicker and you don’t need some of the extras – acetate and a cake ring. Since I didn’t have all the ingredients, I made do with what I had, and it didn’t disappoint, so don’t let laking a few ingredients or hardware items stop you from trying something NEW. I didn’t have citric acid, grape seed oil and glucose, so I used light corn syrup instead of glucose and vegetable oil instead of grape seed. I omitted the citric acid.

I LOVE the crunch that the cake crumbles add to this cupcake, and the cute and simple decoration they provide! This cake and frosting really ticks all the boxes for me! It’s a soft and moist cake, with the sprinkles giving it a slight crunch of texture. The frosting is smooth and slightly tangy, and we’ve already given much love to the cake crumbles.
I highly suggest making this recipe just because – it won’t disappoint! Don’t let the recipe name “Birthday Cake” keep you locked in for baking it just for a party. Make this cake just because you want to smile or put a smile on someone else’s face!


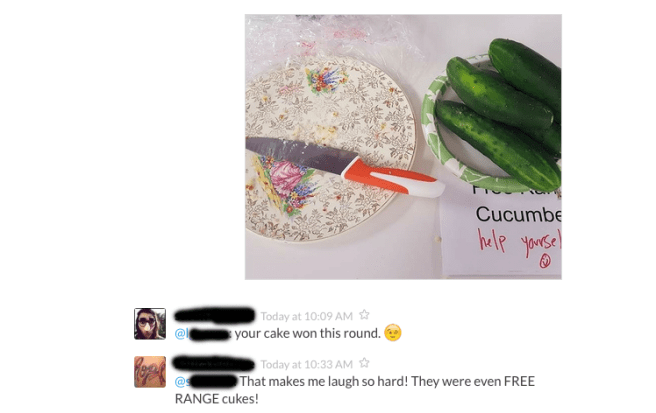
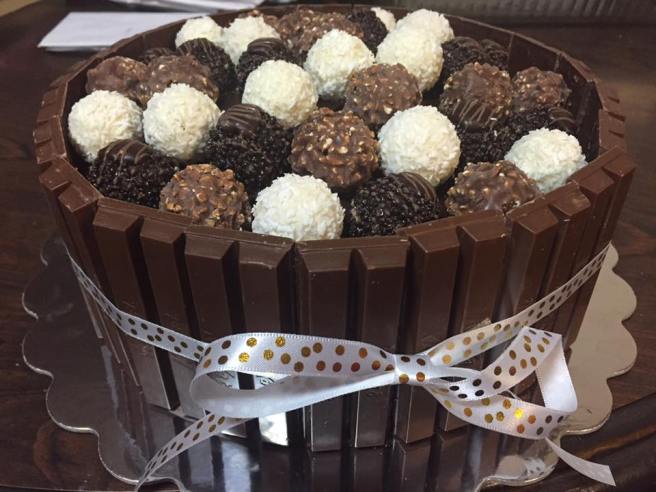
 I knew when I decided to participate in the auction that I would make a candy cake – as those are always a big hit – I mean come on … who doesn’t love them some candy! The second cake I decided on the “Lumberjack Cake,” which has not only taken the internet by storm, but also has been tagged with my name on Facebook many times by friends and family. I decided to forgo the axe and use simple ribbon to accent this great looking cake.
 For those who are not familiar with the “Lumberjack Cake” it is a red and black checkered cake to simulate plaid and the outside looks like a tree stump. For obvious reasons, I didn’t cut into the cake to see the checkered effect, but I will be making another one in the very near future just so I can cut it open and see it!
 This recipe frosts 24 regular cupcakes OR 12 extra large cupcakes with a 1:1 ratio of frosting to cupcake! You can half this recipe and probably be just fine.
 piping tip, however, I don’t suggest doing this at 9:30 p.m. (lesson learned!) or you may be up awhile. I don’t drink coffee, but if it tasted as good as this buttercream, I may just start!
 First it was a red, white and blue swirled vanilla cake frosted with a simple vanilla buttercream, decked out with a fondant and buttercream logo.
 Second was 24 Finding Dory cupcakes – 12 chocolate, 12 vanilla, frosted with vanilla buttercream, topped with cute candy decorations (Pop Rocks, Starburst coral and fondant seaweed, and sticker characters from the movie.
 Third was a chocolate and peanut butter explosion cake! Chocolate cake frosted with peanut butter buttercream topped with chocolate ganache and chopped up peanut butter cups.
 Sometimes I have a deep desire to get my hands dirty. The other day was one such day. I hate gardening so I prefer to dirty my hands while baking; and if I am going to get my hands dirty making it, then I want to make something so good you can’t help but purposely getting it on your fingers so you can indulge in your inner child and lick your fingers! This bundt cake recipe is one such recipe.
 Grease and flour a bundt pan ( I used a baking spray and flour). From reading the comments on Baking in Arizona’s page many people stated even using a nonstick bundt pan requires prepping the pan with grease and flour.). Preheat oven to 325 degrees. Mix all cake ingredients together in a mixing bowl with an electric mixer or by hand (but make sure to get all dry ingredient incorporated. Fill bundt pan with half the batter. Spoon half of the raspberry filling in separated spoonfuls over the batter just as you would do for a marbled cake. Use a knife to swirl the filling through the cake without scraping the sides or bottom of the pan. Pour other half of the batter over the raspberry filling. Cook 1 hour and test the center with a toothpick or knife. If it comes out wet cook in 3-5 min. intervals until it does. Remove pan from oven and let cool on a rack. After cooling for 20 minutes, gently run a knife around the outside and inside edges. Place serving dish on top of pan and flip to release.


 So I went to work making enough cake and cupcakes to feed a small army. I decided on keeping the cake flavors simple, but to go slightly crazy on the frostings!
 I made 84 cupcakes (not all shown) and one double 13×9 cake. The cake was chocolate cake with peanut butter frosting and filled with chocolate ganache and decorated with PB cups and a printed sugar sheet (thanks Callie and Frank’s Bakery!)
 The cupcakes were chocolate cake either frosted with marshmallow buttercream, espresso buttercream or chocolate ganache buttercream, and vanilla cake frosted with either peanut butter frosting, chocolate ganache buttercream, vanilla buttercream or filled with key lime curd and topped with marshmallow buttercream.


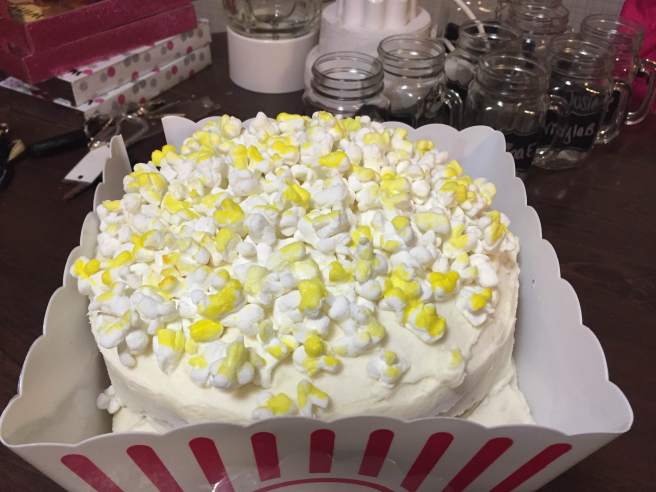
 When thinking about making popcorn for the top I immediately thought of mini marshmallows. I bought a bag and went to work. I took each one and cut the top in a cross hair pattern about a 1/4 to 1/2 way down, which made them look like molars!! Not exactly what I needed for this cake, but who knows what I might need in the future!
 I pinched the bottom where it wasn’t cut and twisted which made them puff slightly where it was cut. On some I pulled the cut ends a little more apart to give variation to each “kernel.” Grab a marshmallow, cut, pinch, pull, repeat. Once I had enough to create the illusion of a mound of popcorn, I added a layer of fresh buttercream to the top of the cake to ensure the pieces would stick to the cake. To give it some color I took some yellow gel food coloring and put some in a dish with a touch of water to make it easier to paint onto the marshmallows. I did try the liquid food coloring first, and even with water, it looked more orange than yellow. I randomly picked pieces to color, and the end result was amazing!